- Portfolio ▼
- | Blog
- | Affiliate discounts
- | Guestbook
- | Info
- | Contact
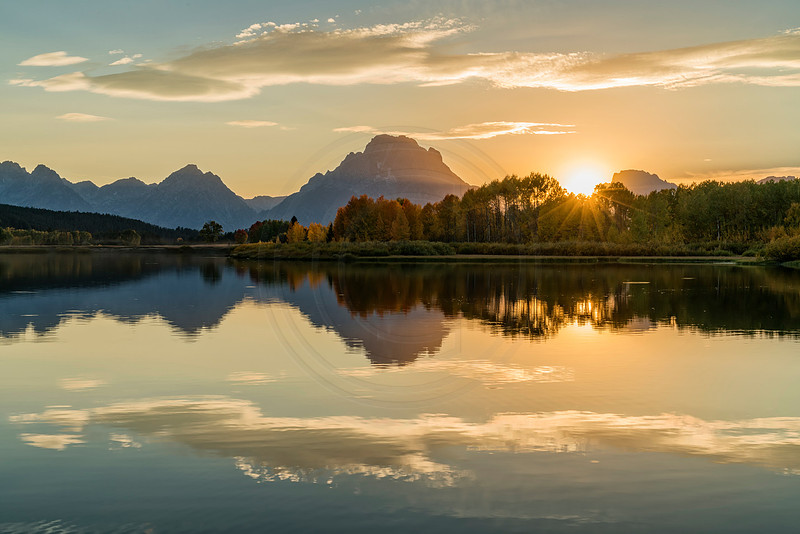
Processing for shooting into the sunDisclaimer: never look into the sun; your eyes will be damaged. Do not look into the sun with a camera with an optical viewfinder; your eyes will be damaged. Shooting into the sun can be difficult. Many camera sensors find it hard to create good images while pointed directly into the sun. The problem is that those images typically have too much dynamic range (see a previous blog on dynamic range). If you expose for the sun, the rest of the image (or much of it, at least), will be too dark, or shall I say black. If you expose for your blacks then the sun and the surrounding area will be blown (white with no detail). So exposure is a challenge. To solve this problem photographers have used graduated neutral density filters for a long time. However, these filters help most when the horizon is flat as the neutral shading is also a flat line. Taking an image of the setting sun on the ocean is a great example of where such a filter works best. When taking images of landscapes, however, the filter is not that effective as mountains are rarely flat. Where this filter cuts across the mountain it will darken that section of the mountain which of course is a telltale sign that you used the filter and it really does not look pleasing. With the advent of digital photography and more specifically, more sophisticated post processing photographers began to prefer blending multiple files. They would take a number of images at different exposures and blend them together to get a good image. HDR (high dynamic range) photography became the hot topic, but early on those images were not natural as especially the clouds turned into an HDR gray. Many photographers turn to 32-bit processing today to achieve a more natural look. The sensors in today's modern cameras have also gotten more sophisticated as they can deal with more dynamic range by themselves. Nikon and Sony, in particular, have cameras that shine when it comes to dynamic range. Since I have turned to Sony I rarely use any graduated neutral density filters or 32-bit processing because the sensor can deal with a stunning variance between very dark and very bright. So how does one shoot and then process an image taken into direct sunlight?
The reason why I do not care where my blacks fall (mostly), is because the Sony just does a wonderful job of capturing details even where it looks just black. Hidden somewhere in there lurks a lot of detail. By now, I hope you know that I only shoot raw when I shoot landscapes (for the purist out there wondering why I qualified the statements with "when I shoot landscapes," I will gladly admit that I actually shoot jpg's when shooting sports)(I think I have written a blog on that topic, please check previous blogs). Open the raw file in your favorite raw processor. Recover your blown highlights with the "highlight" slider (by moving it to the left). Now push your blacks by sliding your "darks" slider to the right. Magically, your blacks start revealing detail, in color and with little to no noise (generally, obviously this can be overdone and more noise will appear). If this does not do the trick you can bring up your darks even more, using the curves adjustments. Now remember to set your white point and your black point and continue with your workflow. If you do not believe me, look at this image above. Look at the Sedona images (Arizona section of the portfolio). Look at any other image with the sun in it. Almost all of them are from one single exposure. For more tricky images I double process a single frame and use luminosity masks to blend them (please see a previous blog on luminosity masking). There you have it. Be brave and shoot into the sun. Remember, always place the safety of your eyes first. Comments
No comments posted.
Loading...
|
Subscribe
RSS
Archive
January
February
March
April
May
June
July
August
September
October
November
December
|