- Portfolio ▼
- | Blog
- | Affiliate discounts
- | Guestbook
- | Info
- | Contact
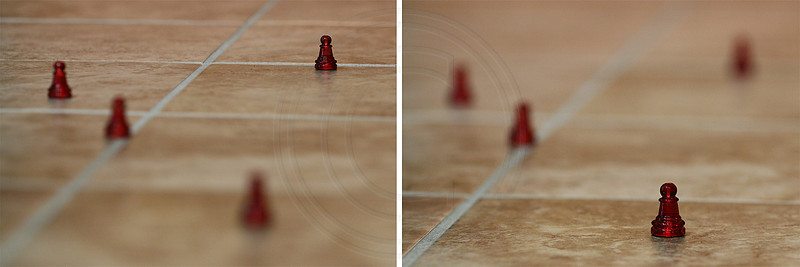
Directing the viewer's eyes: Part IIISo last week we talked about using brightness to direct the viewer's eyes to where we want them to look and thereby to enhance our composition. This week we are going to explore using focus to direct the viewer's eyes. We have already said that the human eye will always go to that which is in focus. If there is an in focus element and an out of focus element in the same image the viewer will pay less attention to the out of focus element and focus on the in focus element. The image below has two images side by side. Close your eyes, and pay close attention to where your eyes go as you look at these two images. Ready? Okay, now look:
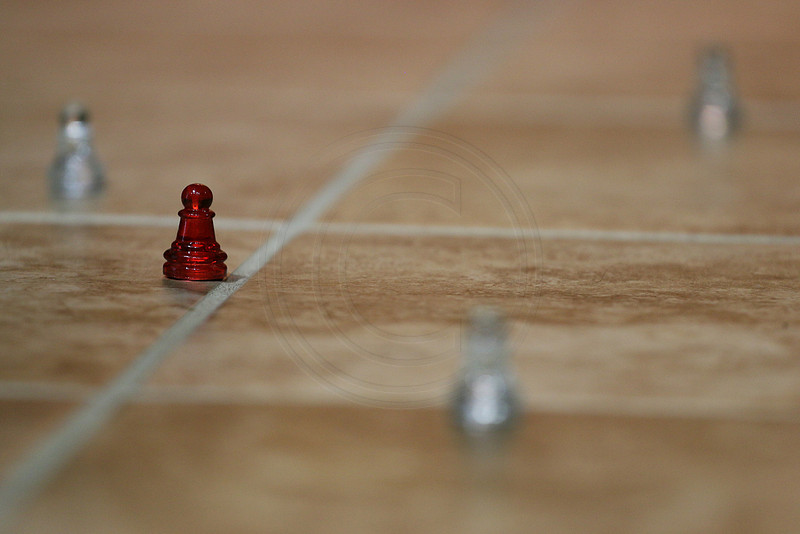
Where did your eyes go in the image on the left? Where did your eyes go in the image on the right? So your eyes chose to focus on the far back and right object in the image on the left but on the near right object in the image on the right. Your eyes went where they went simply because of what is in focus. All the objects are the same, both in color, size, etc, and brightness; so these things did not play a role in directing your eyes in these images. Focus can be used very powerfully to direct the viewer's eyes. Notice that these images have a line of grout going into the image. Our eyes also follow lines. You may have noticed a little bit of a competition for your attention between the lead in line and the in focus object (image on the right). To get only part of an image in focus we use a large F.Stop. Two weeks ago it was mentioned that our eyes also go to that which is different. Let's now combine using focus and difference to direct the viewer's eyes. Where do your eyes go in the next image?
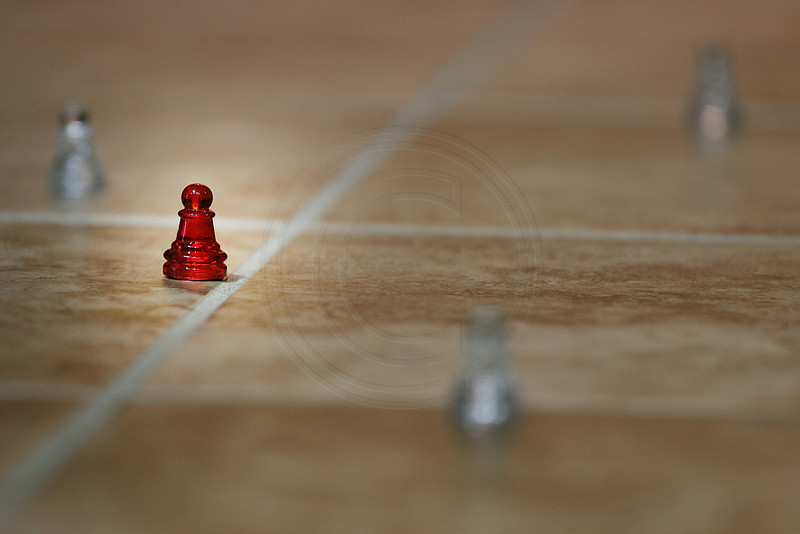
So here we changed the objects' color to make one different from the others. We also focused on the different colored one. In so doing we are combining two techniques to more powerfully draw the viewer's eyes. We changed the position of the different and in focus object to take advantage of the lead in line, which will also help to take the viewer's eyes to the red object. Lastly, let's take the same image and brighten the red object. Now I just pulled the image into PhotoShop and selected a rough circle around the red object (lasso tool). I then right clicked inside the selection which brought up a dialogue box on which I clicked on feather. I then entered a number of how feathered I wanted my brightening effect to be (I chose 250 in this case). Using a mask I just increased the brightness. Please forgive me for overdoing the effect (I also darkened the rest of the image a bit to overdo the effect); I just want you to see what it does (in landscape photography I use this effect much more subtly). Here is the image again:
There you have it. We are using three things to draw the viewer's eyes. Firstly, the object is in focus whereas the other object are out of focus. Secondly, the object is different (color) than the others. Thirdly, it is brighter than the other objects. Composition is not just about where we place what in our images; we can use focus, difference, and brightness to greatly enhance composition. When I process even my landscape images I selectively, but subtly, brighten object to create a stronger center point of interest. We carefully pick where we focus (depending on what we are shooting). We also frame our images very carefully looking for and using things that stand out because they are different. Learn to "see" and use these three compositional aids. Be creative ... Comments
No comments posted.
Loading...
|
Subscribe
RSS
Archive
January
February
March
April
May
June
July
August
September
October
November
December
|