- Portfolio ▼
- | Blog
- | Affiliate discounts
- | Guestbook
- | Info
- | Contact
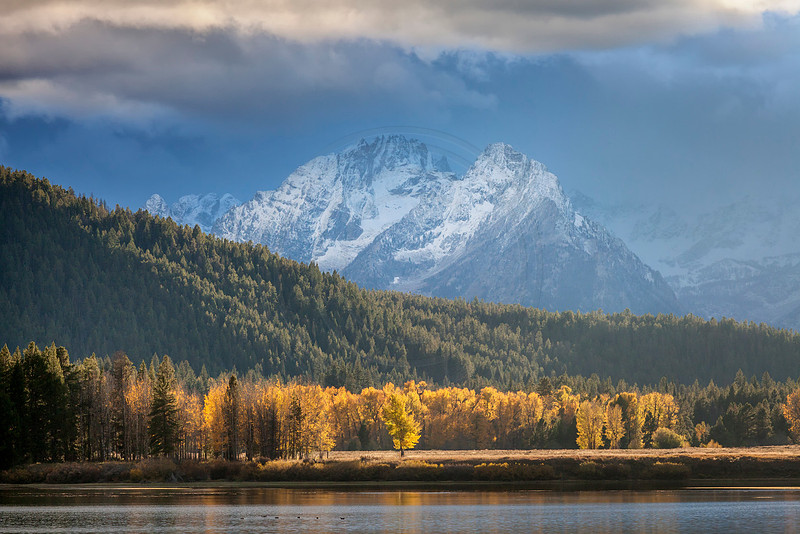
Directing the viewer's eyes: Part IILast week we said that photographers can direct a viewer's eyes by using brightness, anything different from the rest of the image, and focus. Today we pay closer attention to brightness. Remember that the human eye always goes to that which is the brightest. That includes bright colors and light brightness. Let's have a look at the following image:
Where do your eyes go first? Once your eyes have wondered around, where do your eyes come back to? The brightest color and light are the yellow leaved trees. That is the spot that commands our attention. So we get this kind of shot by waiting for the light to shine where we want it to be bright; cloudy days are best since you can wait for the clouds to move around. As you can see the light shone there the brightest. You will also notice that the green trees in the middle ground are brighter in the center and darker to the sides of the image. That helps to keep the viewer's eyes from going to the sides. It also helps to pull the viewer's eyes deeper into the image once he or she is done looking at the bright yellow trees. The white snow in the background is also brighter than the rest of the mountain, so that pulls the viewer's eyes even deeper. So our eyes go to the bright yellow trees first, then to the middle ground and then to the background, and back to the yellow trees. We want people to repeat this pattern of looking at the image. We want the viewer to look "into" the image rather than looking at it as a two dimensional flat image. We want depth. In this case the different levels of brightness provides that depth. Now we are not always so lucky to have the light cooperate with our desires. What if a scene is evenly lit? What if the light is soft all over the landscape? Do not despair, we can subtly make our center point of interest brighter when we develop our shots. There are many techniques to do this. I often use Nik Filters' Viveza to achieve this effect. The next image was made during overcast conditions. To pull the viewer's eyes into the image, thereby creating depth I brightened the part where I wanted the viewer's eyes to go. Now the image was a bit brighter there anyway, but not enough to do the job I wanted, so I boosted the brightness only there:
The two lessons we can learn from today's blog is:
These two lessons can add a lot to your images. Comments
Donna Krazan(non-registered)
I love these little lessons. Keep them coming and thank you so much for sharing your talent.
No comments posted.
Loading...
|
Subscribe
RSS
Archive
January
February
March
April
May
June
July
August
September
October
November
December
|