- Portfolio ▼
- | Blog
- | Affiliate discounts
- | Guestbook
- | Info
- | Contact
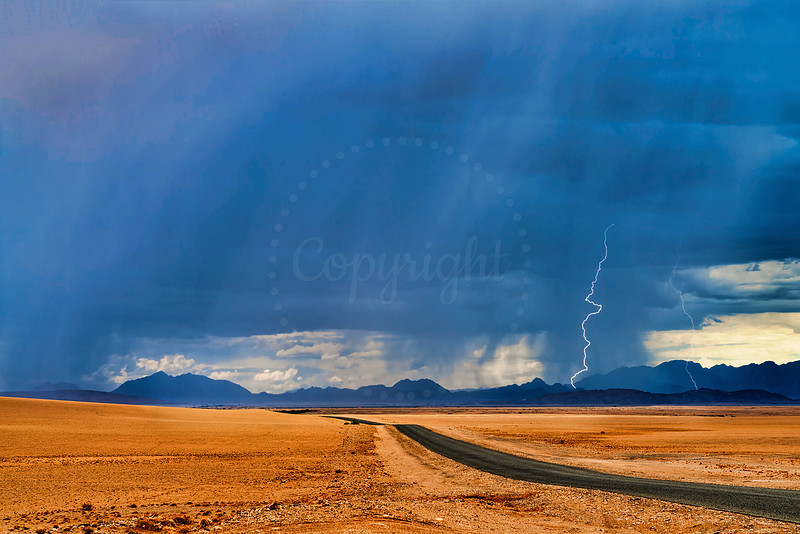
What you need to make day-time lightning imagesLet's look at our example image first today:
This was taken late one afternoon. This was a fairly fast moving storm. The rain and lightning just took place in one area. Behind me was clear and bright. It was equally bright and clear to the left and to the right. Beyond the storm, straight ahead was also bright. So how do you control the ambient light since it is bright daylight? How do you get your camera to fire when the lightning strikes? Since it is bright you cannot use long exposures. First I used a three stop neutral density filter to bring the shutter speed down. Please note that you cannot make it any darker to use a longer shutter speed and still get this image the way it is because the clouds and rain are moving. You need your shutter speed at about 1/8th to 1/15th of a second. Set your ISO very low to enable you to reach this desired shutter speed and of course use a small F.Stop for the same reason. Next I used a lightning trigger to fire my camera. Go wide because you don't know where the lightning is going to strike. I was hoping the strike was going to be on the left as that is where the majority of lightning activity took place when I setup my gear. That is way I place the road where it is placed. I wanted to road to lead to the lightning. As you can see it struck elsewhere, but that is okay. It is still a nice image with a nice strike, even two strikes. I will share more about lightning shooting in the weeks to come. Comments
No comments posted.
Loading...
|
Subscribe
RSS
Archive
January
February
March
April
May
June
July
August
September
October
November
December
|